The PlanMinder Manual - 04 Work Schedule
This is one chapter from the manual. Access the full manual here.
Work Schedule
▶ Video reference Developer @ 5:23On the work schedule page you define when and how much your team will be working, or more specifically when and how much The PlanMinder can schedule developers to activities.
The left side is a table with individual entries. The right side is a graphical representation of the work schedule for all developers. Click in the People column to select whose schedule entries you want to see in the list. You can also double click on a rule in the plot to select both the person and the specific rule.
If you select the General symbol in the Peoples column you will see the list with general rules.
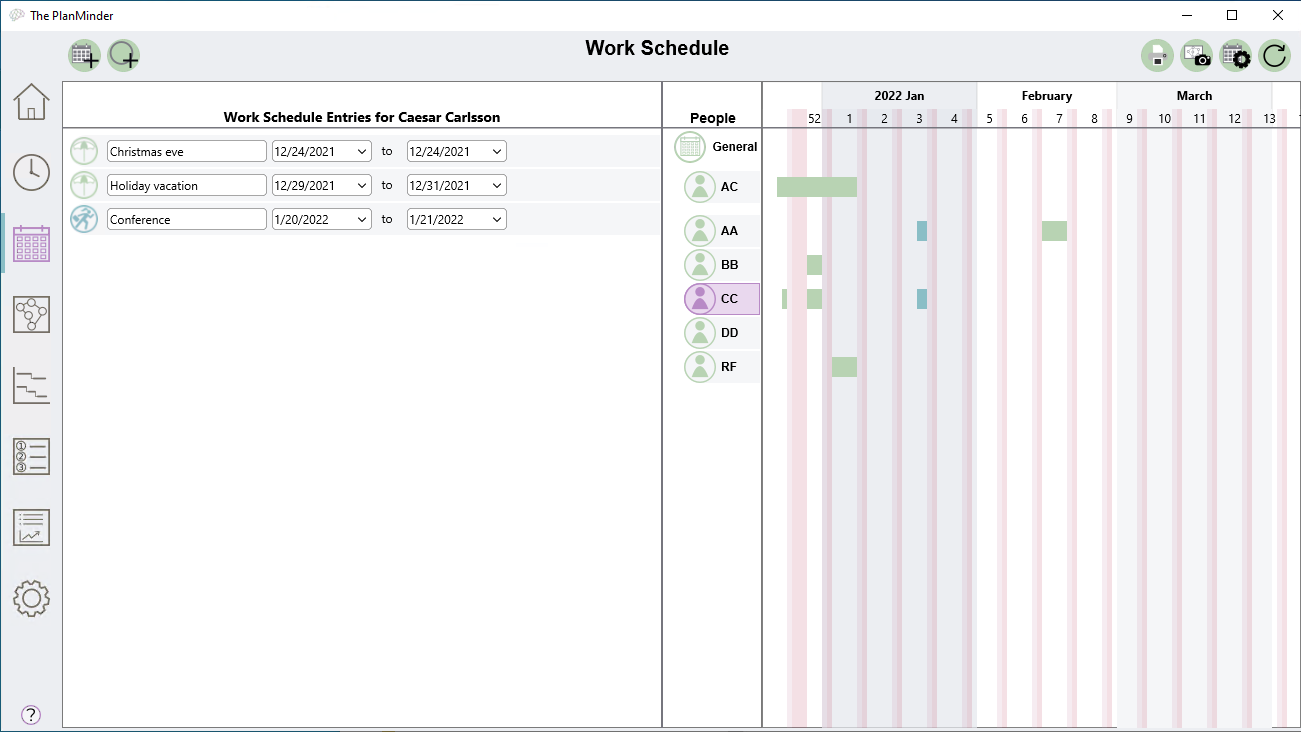
Editing your work schedule
As a developer you can edit your own work schedule. As an administrator you can edit all work schedules including the general schedule.
 Click on the Add Rule button to add a new entry to the list. This will open a rule type selection dialog. You can also double click on a date in the plot, for you user only, to open the Add Rule dialog. This will preselect the clicked date for the new rule.
In the dialog you can select one of the following rule types:
 Base modifier: How many percent on an average work day you will be working on scheduled activities. You may spend part of your average week on meetings, administration or other tasks not part of the project activities The PlanMinder schedules. Adjust for that with this rule.
 Exception modifier: Make a temporary exception to the base modifier, replacing it for a specified duration.
 Leave preliminary: You will be on leave, but marked as preliminary.
 Leave requested: You will be on leave, but marked as requested not yet approved.
 Leave vacation: You will be on leave, marked as vacation.
 Leave parental: You will be on leave, marked as parental leave.
 Leave: You will be on leave, without specifier.
 Reserved for work: You will be working, but not available for scheduled project work. This may be things like conferences or business trips.
 Part day: You will be working less than a normal day. You specify how many hours of work you will do. Marked with a yellow line in the calendar plot.
 Overtime: You will be working more than a normal day. You specify how many hours of work you will do. Marked with a pink line in the calendar plot.
 Start from: Specifies first day of work for a new team member.
 Work until: Specifies the last day of work.
Click on a rule type to create a new rule entry. The new entry will appear expanded at the top of the list, where you can edit the parameters. The exact parameters depends on the rule type. Usually there is a start and end date. For the short day rule, and similar rules, there is a field where you enter how many hours you will be working. All rule entries have a label and a comment.

Once completed, click the save entry button. The entry will be sorted into the list, with the earliest dates on top. Entries with past dates are sorted after future dates, and they will show the delete button.
To edit an existing entry, click on it to expand it. You can change parameters and save, or delete the entry. To change entry type, select a new type in the drop down.
With a rule expanded and with a date selector focused, you can click on the timeline to set the date.
Editing the general work schedule

If you have Admin privileges you can edit the general work schedule. This is where you define how long a work day normally is, and which days are normal work days. Click on the general schedule icon in the Persons column to access the general schedule rules.
The general work schedule have these rule types:
 Normal work day: Specifies length in hours of a normal work day.
 Weekday is holiday: Specifies a day of week where there is no work. Marked with red background in the calendar.
 Weekday is free: Specifies a day of week where there is no work. Marked with a light pink background in the calendar.
 Weekday is short: Specifies a day of the week with a different number of work hours than the normal work day. Marked with a yellow background in the calendar.
 Day is holiday: Specifies a date where there is no work. Marked with red background in the calendar.
 Day is free: Specifies a date where there is no work. Marked with a light pink background in the calendar.
Day is short: Specifies a date with a different number of work hours than the normal work day. Marked with a yellow background in the calendar.
The rules types are different, but you edit them the same way you do personal schedule rules. There is in practice no difference between free days and holidays, except for the background color. Use the rules to match your local calendar style.
Importing holidays
 The import holiday calendar button lets you import official holiday rules for several years into the future. Click on the button and select your country from the list, and which years to import. Do verify that the imported holidays are correct, and that the list is complete.
 Delete past holidays by clicking on the delete button to keep the list neat.
 The Delete old schedule entries button lets you delete all entries before a certain date. It can be used for personal rule entries too.


