AWS Managed Database Service

Step by step guide to set up a PostgreSQL server for The PlanMinder using Amazon RDS

AWS is the biggest cloud service provider in the world. They have a myriad of services and options, and a detailed pricing system that can be hard to understand. They also have a free tier managed database service suitable for The PlanMinder. The free tier is free up to one year, provided that none of the usage limits are broken. (You can expect to be paying a few cents for backup space even during a free tier period.)

The free tier can handle a maximum of 40 simultaneous users of The PlanMinder, but you will notice a degraded performance much earlier than that. You can however at any time change the instance type to increase performance.

This guide will take you through the steps of creating an Amazon RDS PostgreSQL instance and database. You will be up and running in about 15 minutes.

Powered by AWS Cloud Computing
https://commons.wikimedia.org/wiki/File:Database-postgres.svg

1. Sign up with AWS

You must first sign up with AWS (which includes registering a payment method, i.e. a credit card). Note that Auspicia and The PlanMinder are not affiliated with Amazon, and this is a business transaction between you and Amazon

When signed up, sign in to your AWS Management Console.

Amazon Web Services

Click and sign up.

Create a database

2. Select All Services, and RDS under Database.

3. Select a region in the upper right corner. Select a region geographically close to you for best performance, but note that not all regions provides the free tier service.

4. Click the “Click Create Database” button.

5. Select PostgreSQL, and a version. The PlanMinder has been extensibly tested with version 12, so choose 12.8 or newer.

6. Select template. If you do not see the free tier option it is not available in the region you selected. Change region or select the Production template. You may want to select the production template for other reasons, like having more performance, the option to encrypt the database or the option to have a standby backup server.

7. Enter settings. You can change the DB instance identifier, and the Master username. You will use the master username later. Select a strong password.

8. Select DB instance class. If you are going for the free tier, stick with the default. Otherwise, find the most economic option that fits your need. The amount of RAM determines available connections, and how many simultaneous users you can have. Rule of thumb, the max limit increases by 50 per GiB, and by 20 with good performance. The PlanMinder does not generate a lot of data to store. It is measured in MiB, not in GiB. You can check how your selection affects the cost estimate at the bottom of the page.

9. Select storage. General purpose and 20 GiB should be enough. Checking Enable storage autoscaling will increase it if it ever becomes necessary.

10. Select Availability and durability. For free tier "Do not create a standby instance" is the only valid option.

11. Set connectivity. You need to set public access to Yes. It is advisable to select "Create new" for VPC security group, and give it a name.

12. Set database authentication to Password authentication.

13. Set Additional configuration. Expand this field, and write a name in the Initial database name field. This is the name of your database, and it will be used when logging in, and visible in the header of The PlanMinder application for all users.

You can review the other settings too, but the default settings will work.

14. Click the “Create Database” button, unless the estimated costs triggers you to make changes.

2.

5.

6.

11.

13.

Prepare the database

15. Clicking the create button should take you to Amazon RDS and Databases. Otherwise navigate there yourself. There will be a row for your database instance. It will have status "Creating" for a little while. When it changes to "Available", click on it to open the instance page.

16. Under Connectivity and security you will find an endpoint string. Copy this string and start The PlanMinder. On the login screen, copy the endpoint string to the Server Address field. Enter the port number. 5432 is default, but if you have changed it, you can see that under Connectivity and security. Enter the database name you chose in step 13.

17. Click on the Service login tab, so that it becomes pink. Enter the Master Username and your selected password. Then click the Login Button.

18. If everything is correct, a connection is established, and The PlanMinder pops up a dialog saying “Database does not contain PlanMinder tables. Do you wish to create them”. Click Yes. Moments later, you will be logged in to your new The PlanMinder database.

19. The PlanMinder will be quite empty when you first enter. The first thing to do before starting to make plans is to create a user.

Go to the settings page, and select the Users tab.

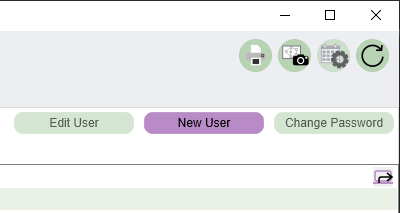
20. Click the New User button and create a user for yourself.

Username is the name you use when you log in. Pair it up with a strong password.

21. Fill out the other fields and when you come to the checkboxes, make sure that the Administrator checkbox is checked. If you are going to use The PlanMinder you should also probably check Developer, Manager and Regular. If you are setting this up for others as an IT administrator, Administrator will be enough.

22. Click on the "Copy application login link to clipboard" button at the end of the new user row. This puts a link that starts The PlanMinder in the clippboard.

23. Now you can close The PlanMinder, restart it and log in with your new user. Click the Paste button to fill out the fields with the link you copied. If you fill it out manually you have to change the tab to User Login, and enter your new user name and password.

17.

20.

Congratulations!

You can now start working with The PlanMinder. The database is ready, but you must also register it.

Go to the Settings / Registration tab and register your database. Fill in the form, click Register, and enter a password when prompted. You will get a confirmation email, and must click the link in the email to confirm your registration.

When confirmed you can go to the License Key tab and click Download Keys to get your 60 day trial license.

Next you may want to configure The PlanMinder to suit the needs of your team. You can read the guide Setting up The PlanMinder for Your Organization.

Register your database.

A few extra tips

pgAdmin 4 is a good tool if you need to manage your database. You can download tools from postgresql.org, and read the general guide on how to manually prepare your PostgreSQL database for The PlanMinder.

You can create more databases on your Amazon RDS instance, without going through all the steps above. First connect pgdmin 4 to your instance by right clicking on servers, and select new. Enter the endpoint, port and main user and the password.

When connected you will see your existing database, and you can create a new one by right clicking on your server name. Then repeat from step 17, but with the new database name.

PGAdmin

pgAdmin 4